7/29/10

More Apron Blocks and Organization

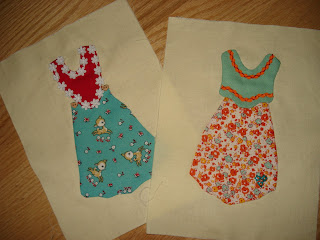
In my quest to embellish my apron quilt blocks I thought a little more organizing was in order.

 
I went from this mess above to this neat and tidy drawer below.

 
Now next time I am shopping and wonder if I need any rick rack, I will know the answer to that.


This is a check book cover I whipped up for my daughter. It's one of those origami type that were all the rage a few years ago.  They don't take any sewing, you just stiffen the fabric then fold and press. It works best with batiks or some sort of fabric that doesn't have a right and wrong side, but this was the fabric she picked out so I just used two pieces of fabric ironed wrong sides together. 
7/25/10

Finishing touches

I've had a few little odd projects that have been sitting around just waiting for the finishing touches.  Two of them just needed a simple snap to be called finished.
This is an eye glass case for my Etsy shop.  It was looking a little punky so I had to add a few things.

 
This little purse is the perfect size for a couple of tea bags, a gift card, punch cards, or any thing small you don't want to get lost in the bottom of your purse.

And this is just another little sewing kit, that I have on hand so when I sell another I'll be ready to list it in my shop.

7/19/10

A Saturday aftenoon and Press and Seal

I have been wanting to embellish my apron blocks ever since I started making them but here is the reason why I haven't . . . .
I have an excessive amount of laces and trims but I would look at this mess and think "it's just not worth the hassle."
 
So I dumped out the whole works and decided to get organized.

So with spools, clothes pins, Press and Seal and a lot of patience this is what I have now. My apron blocks will never be the same.

7/16/10

Fabric Buttons

I came across this post for fabric buttons over at Michele Made Me and thought it was super cool so I made a few.  You can find out her clever was of making these here.
I have a project in mind for these that's why they all have the homespun-country look to them. I made mine 3/4 inch and 1 inch since that's the size round punches I have.  That made it super simple to get perfectly round circles rather than cutting with a scissors They are more time consuming that just using the store bought buttons that you can cover but it much cheaper and loads more fun..And the best part is you can just use up stuff you have around the house.

7/13/10

Picture This Post That

My daughter's friend loves these little wall hangings that hold pictures.  I made one for her earlier and she requested two more, but I little bigger this time.  So I added a row on the bottom just to keep it simple so I didn't have to do any math.
My daughter got a new camera for her birthday and asked if I could make her a simple case so I made a snap case. These seem to be all the rage now with patterns in every quilt shop in many different sizes.
You just push on the sides and it pops open, then let go and it snaps shut. This is genius, I wish I would have thought of it.

7/10/10

Fun with Friends

We had our monthly get together with my fun group at Evy's yesterday.
Bev and Evy
Evy is a great cook and the food was wonderful.
 
Kathy and Jeanette

Kathy brought along her little Cuttlebug and with a lot of patience taught us how to us it.
 
We had so much fun we didn't want to leave.

Sometimes we really had to concentrate.


I took inventory when I got home and this is what I accomplished in one short afternoon.
Some of the things I just embossed and other things I just cut out to make into cards later.
Kathy had little kits put together for us to make a little cupcake card. that all turned out super cute

7/6/10

What to do next

My mind has been in disarray lately as I just have way too many things going on to the point of not being able to concentrate on anything long enough to complete any project.  So with that in mind, I decided to work on the project that was taking up the most space in my sewing room.  This little project had taken over my cutting board, ironing board, sewing machine table and part of the floor.
This pattern is Eureka by Maple Island Quilts and was a class I took with our local quilt guild. Since this was a practice run I didn't want to buy any fabric so I am just using up what I already have. The pattern is for a wall hanging but I really don't want this hanging on my wall so I'm making it a little bigger and an going to use it a a throw.


My trusty associate, Queen Sophie Mae wasn't much help, but is always nearby for moral support.